Sunday, October 27, 2013

Welcome . . .


Hi, and welcome to my blog . . .

Been really busy lately knitting, quilting, and painting for the holidays!  I have long decided that I stay busy to keep out of “trouble” . . .

I recently had a request for a knitting pattern that I wrote for a cowl and I am finally getting around to posting it!


And Another Drop Stitch Scarf

Materials:

1 skein Lorna’s Laces Sportmate Yarn

String-a-Long Sequin Yarn in color to match

Size 10 – 16” circular needles

Stitch Marker

CO 110 stitches and join in the round being careful not to twist

Round 1 -  K

Next two rounds add sequin yarn with main yarn

Round 2 – K

Round 3 – Purl

Cut sequin yarn leaving a 6” tail

Round 4 – K

Round 5 - *K1, YO two times, K1*, repeat around

Round 6 -  K dropping YOs

REPEAT Rounds 1 – 6 four more times.

BO in Knit.  Weave in ends.  Block if desired.  Wear and Enjoy!!

Pattern designed by Cole Springs Studio®

I used yarn purchased from our local yarn shop, Main Street Yarns, which is Lorna’s Lace yarn (quite yummy) and for a little bling I added String-a-long with the yarn.  The string yarn has sequins in it and is quite easy to knit while holding another yarn.  You can chose not to add the bling and a different yarn as gauge does not matter on this project.  In fact, if you want a longer or infinity scarf just add more stitches as long as you keep the number even.
 
A close up of the stitches . . .


This is such a quick and easy knit.  Hopefully, you will make lots of these for Christmas, birthdays, special occastions, etc. 

I have also tried different techniques using fabric and one of my favorite products, Peltex®, on one of the projects.  If you know me, you know that I love to applique and this little quilt came together pretty quickly.  I made four 8” log cabin squares using blue fabrics and then found some orange and yellow fabrics to make the flowers.  And of course had to add embellishments . . . beads, brads, wire, and even a washer.  My goodness it was so much fun to do and quite colorful, too.


Two close-ups . . .
 

Oh, and had to get ready for Christmas with a few ornaments.  I love birds, so I made a template and found the colors I wanted (I did the wings different on each bird), peltex, and ribbon.  I affixed the fabrics to the two-sided fusible Peltex® and traced the bird onto one side.  I then cut it out and painted the edges with acrylic (cheap kind) paint, and sewed on a ribbon for hanging.  And for a little more bling, I stuffed a bird, painted with Mod Podge®, sprinkled with glitter and sewed a ribbon on for hanging. Easy peasey!


I found in one of my old paper crafting books a woven heart pattern.  I found the fabrics I wanted, ironed them onto Wonder Under®, cut them out and put them together weaving in the strips.  I painted over the surface with glitter glue, and attached a ribbon for hanging.  I should point out that this heart is made from two heart shapes and any size. You need to cut equal size strips on each heart and then weave the strips together to create this look.  It would be really neat to do larger hearts and putting it on a quilt, pillow, bag, etc.  Possibilities are endless. 


I will post some more Christmas ornaments in my next post.

I am an ardent follower of Quilting Arts and on one of their shows I saw where an artist, Barbara Schneider, made a leaf from fabric.  She specializes in 3-D art and it is fabulous!  Now hers is so much better and quite a bit larger, but I just had to try it on a smaller scale.  For the first one, it wasn’t half bad.  One of her art pieces was a 6’ square of leaves and quite awesome.  I don’t think I will ever get that big, but the small leaf was a neat and fun project.


A close-up . . .


Have a great Halloween.  Remember that in whatever you do just have FUN!!!

Saturday, September 28, 2013

HALLOWEEN


Halloween is just around the corner!  It is such a fun holiday to decorate for.  I love all the scariness, but with so many grandchildren I have to tone it down a bit.  I wanted and “needed” a new table topper for Halloween, so I decided why not make a candy corn one using the Dresden Plate block. 

You will need the following to complete this table topper:

White, orange, and yellow fabric scraps for wedges
Fabric scrape for center
Easy Dresden ruler by Darlene Zimmerman
Low Loft Batting
Peltex(r) 2-sided Fusible Heavy Interfacing
Wonder Under® or a double sided fusible lightweight interfacing of your choice
Fabric for back
Thread


I went through my stash and found scraps in the colors that I wanted.  You can buy yardage and 1/8 yard would be more than enough.  You will cut the white, orange, and yellow fabric as follows:

White       2-1/8” wide strip
Orange     4” wide strip
Yellow       3” wide strip


These measurements worked using my Easy Dresden ruler which measures 8” by 1”.  Gave just a bit of wiggle room....


Sew your strips together using a ¼” seam allowance.  


Press your seams open.

Take your Easy Dresden Ruler and cut 20 wedges!  REMEMBER to always have the narrow end of the ruler on the white fabric.  This will waste some of the fabric, but you can keep for other projects.


 You should have a stack of wedges . . .


Lay out the wedges in a pattern that you like and begin sewing them together using a ¼” seam allowance.  Press seams open.


When joining the wedges together be sure to pin the two seams making sure that they meet….


Now this is ½ of the circle . . .


 And this is the full circle…


Now I give this circle a good PRESSING and STEAMING to make it lie flat as possible.  DO NOT IRON . . . MOVING IRON BACK AND FORTH.  Just Press up and down using steam to avoid stretching the fabric.  Lay the circle onto a piece of low loft batting and quilt as desired.

You will see that I straight-lined quilted mine.


Not sure if you can see the quilting, but I quilted down all of the wedges on both sides and around the circle of the orange and yellow on both sides.
 
Find a piece of fabric that you like and that will enhance your Dresden circle.  Using a circle object (I used a bowl), trace onto paper side of fusible interfacing, press to wrong side of fabric, and let cool.  When cool, cut it out, peel backing, and fuse to the center circle area of your Dresden circle.  I satin-stitched around my circle, but you can choose whatever method you like or you could even do a needle-turn applique circle instead.

 
Take your finished circle and fuse to the Peltex and backing fabric.  Cut our around the Dresden Circle and satin stitch around the edges.  You could skip this step and just use a backing fabric and bind your table topper if you would like.

 
My finished table topper ready for my table . . .


My friends know that I LOVE Peltex® and use it for a variety of projects.  I liked the idea of doing a spider candle mat so I found a die-cut spider some black fabric, Wonder Under®, orange fabric, Peltex®, and backing fabric.  I drew out the spider web onto the orange fabric and then satin stitched over the lines with a narrow stitch width and then fused the spider to the bottom.  Quilt as desired.  Affix to Peltex® and backing fabric, quilt some more, and satin stitch the edges.  For this particular little quilt, I used felt for the backing fabric.

A little glitter glue for eyes and hourglass and I had a cute little candle mat.


Whatever you choose to do, remember HAVE FUN!  And don’t sweat the small stuff!!

Wednesday, September 18, 2013

It's been a while!  Life gets busy and I have lots of WIPs that I am constantly working on as well (hee hee) adding new ones! 

Now it's time to plan for the upcoming holiday . . .

I love Halloween and decorating for this spooky holiday so I thought I would share some of my Halloween projects with you. 
These are some Trick or Treat bags that I found the pattern for in one of my magazines.  I made four cat bags for the girls and a Frankenstein bag for Avery.  How simple the appliques are . . . shapes!  You could even buy the pre-made muslin bags from a craft store and decorate!  Use your imagination and have fun!  Your children or grandchildren will love them!


I made the Halloween pumpkin pillow a couple years ago at a class that I took at Dragonfly Quilt Shop.  The Haunted Tree Pillow, shown below, I found it in a magazine featuring Patrick Lose.  Love Patrick Lose's applique! 


This is Patrick Lose's design!


This birdhouse was made by my husband and I decorated it for the Halloween birds.


This painted pumpkin was inspired from Alisa Burke’s blog.  Hers are much better!!!


The stuffed pumpkin came from one of my favorite artists, Nancy Halversen.  I will have to say I have all of her books and each and everyone of them are GREAT!


This ticker tape wall hanging I made using Halloween fabric scraps.  I cut a piece of muslin and cut squares and rectangles out of my Halloween fabric scraps.  I then sew them around the edges to the muslin piece with batting on the back.  After I finish sewing the fabric scraps to the muslin, I put a back on and sew it together with the front by sewing between the squares.  I finish off with binding and hanging tabs.  I found a square piece of wood in my husband’s workshop, painted it, and after it was dried, hung up my Halloween Ticker Tape Quilt.  I have since made one for Fall and will make one for Christmas, etc.  FUN!  You can also use scraps and Mod Podge them onto a canvas and hang as art (if you do not sew)!


Also using scraps, I made this Halloween fabric bowl.  I will do a tutorial at a later date on how to make these easy and decorative bowls.  Peltex is a wonderful product!!


This Halloween ornament is made using a clear glass ornament, small fabric scraps, and Mod Podge (one of my favorite products).  Just glue your scraps onto the glass ornament with the Mod Podge covering the entire ball!  Add a couple of coats when finished (drying between coats) and hang on an ornament holder.  I also wired a decorative button to the ornament.  You can make one for ALL the holidays!


Finally, I made an Alisa Burke inspired tablescape.  Cute, HUH?


 I will say Bye for now leaving you with this quote,


“I am beginning to learn that it is the sweet, simple things


of life which are the real ones after all.”

Thursday, August 22, 2013

UPCYCLING SELVAGES


I love selvages!!! Just ask my friends and they’ll tell you that I pester them constantly to save them for me. In case some of you do not know what selvages are exactly, let me explain…

The selvage is found along the two long woven edges of the fabric. The selvage is thicker than the fabric because it is folded over itself to prevent raveling during the manufacturing and printing process of making the fabric. Some, but not all, selvages have printing on them (that’s the part I like). This printing can include the manufacturer’s name, their Web site address, maybe the name of the artist who designed the fabric, a copyright symbol, etc. The color dots represent the dye colors used in the fabric during the printing process. You could take the selvage with you to the fabric store to match colors using the dots.

One of the best resources that I’ve found is a book written by Karen Griska called Quilts from the Selvage Edge published by the American Quilt Society, Paducah, Kentucky. The book is very informative, user friendly, and Karen gives examples of some beautiful selvage quilts.

My first attempt at using selvages in a quilt resulted in this wall hanging . . .


I decided to add fabric pinwheels and buttons to embellish it.  The grandchildren love it and so do I.

I also made a throw pillow . . .


Quick, easy, and cute!!

Next is a pincushion and you know we girls need our pincushions...

With the tiny binding along the edges, it turned out quite cute and really functional.

I began making fabric bowls (I also LOVE Peltex) and decided to try one using some of my selvages.  Here is how it turned out . . .


I also enjoy making little purses and decided that one needed to be made using selvages.  It is one of my favorites...


Love it!  I guess you can tell we are DAWG fans and really "bleed red and black".

I've also made hot pads, potholders, boxes, post cards, etc.  Anything I could think of that would highlight these jewels of the fabric.

Selvages are fun to use and upcycling is a way to use them up.  I like to look at them and recall some of the other quilts and projects I made with the fabric it came from. 

Try using some of your selvages in these projects, the ones in Karen's book, or just use your imagination and you will be pleased with the outcome.

But always in whatever you do just relax, enjoy the process, and have
FUN!


Tuesday, August 6, 2013


ABCs – Fun with Dakota

As you probably know, I have a 6 month old Great Granddaughter whose name is Dakota.  She is simply beautiful (you know I am not the least bit prejudiced) and sweet!!  Now that she is beginning to sit up, I thought she would have a good time playing with ABCs made out of fabric ofcourse.

This was a really simple and quick project with supplies that you probably have on hand in your studios.

You will need scrap piece of batting, scraps of fabric, thread to match, scissors, fine point permanent black Sharpie® and letter stencils (I found 6” plastic stencils at Hobby Lobby).


First, trace your letters onto the front side of your fabric...I used black as I planned on using black thread to sew around each letter.  Then make your quilt sandwich:  Back fabric right side down, batting, and front right side up.  Take to your sewing machine and sew with a smaller stitch width than normal (my default is 2.5 and I set the machine at 2.0) onto your traced markings.  Cut out close to the stitching making sure you do not cut into your stitching.  When you have finished all your letters, place them in a pillowcase or lingerie bag and wash.  This is why you should have them in a bag …


I washed mine on low level setting for water, heavy wash, and added some towels using my regular detergent and softener.  When washed, just throw the bag in the dryer.

Now the tedious part:   When dried you will have to trim each letter of the strings (this takes a little while) and then press (I use steam) them flat.  If you do not want the frayed look, you can trim around each letter with pinking shears which would give a neater look.


You are DONE!  Well, you might want to make a bag to keep them in.  I think I will do that for my next blog entry.

Did you notice that there was ALABAMA and FLORIDA fabrics???  Being from Georgia it was awfully hard to sew these fabrics in my house, but my grandson LOVES Alabama and his wife is from Florida so I had to do these fabrics for them.  I did, however, use GEORGIA fabric for the G and purposely did it upside down since I new that the poor little thing was going crazy being bagged up with Elephants and Gators.  And also because my grandson starting calling me Gingaw when he was a baby and it stuck.

While I was sewing, I thought that Dakota might enjoy a little quilt to place I SPY with when you gets a little older.  For the time being, she can just use it to snuggle with.  This quilt was simple and quick also.

I pulled out my fabric drawers and gathered up some fabrics that I thought would be interesting.  I then cut them into 3½” squares and sewed them together making 12 squares per row and 15 rows.  This quilt measures 30” wide by 38” long.  Of course size it the way you like by adding more squares to make it larger and by removing some to make it smaller.  I wanted to make it happy so I added red and white polka dot backing and binding.   I love piecing squares and especially using up my stash.


Not sure if you can see Elvis, but I wanted Dakota to know who the KING of Rock 'n Roll is and will always be!
 
I think the red makes it a HAPPY little quilt!

 
The most important thing that I do is have FUN!!  I hope you will have some fun, too!

“Life gives you a chance to love, to work,

to play, and to look up at the stars.”

--Henry Van Dyke

Thursday, July 11, 2013


Welcome to my studio . . .
I am so glad you stopped by!  I hope you enjoy your visit.

You are coming into what I call my little paradise on earth.  I spend all the time I can in my studio . . . sometimes sewing, sometimes creating, and sometimes just sitting and drinking coffee.  It is so special to me and I would like to share my space with you. This space was a long time in coming as working, owning a business, being a wife, mother, and grandmother was more important at that time of my life.  But when we retired 7 years ago, my dream finally came true.
Come into my studio from the garage. . .


From this area you will see through both of my little rooms.


If you turn to your left, you will be facing the double windows which allow so much natural light in.  But alas, would not cooperate with my camera and flash, so I closed the blinds and this is what I got.  I also use the top of the fabric storage area for some of my creations. Below the windows is a fabric scrap storage that my husband had built for me.  (I have 3 total.) And I just love them.  Now, if only I would just fold the scraps and put them back neatly instead of cramming them in … well it would look better!

 
Turning to your left you will see my OLD desk.  It is loaded with lots of notes, pictures, my stuff.  It really is not as function as a corner desk would be, but I love my antiques and for now it serves me well.
 

Directly across from my desk is the TV and more scrap fabric storage.  I use the TV for music and my wonderful Interweave Videos.

 
By the double windows, I have one inspiration board and one of my favorite creations (idea from Alisa Burke of alisaburke.blogspot.com) a mobile.  I made one for my great grandchild and liked it so much, I made me one, too.  I have really enjoyed it. And some of my threads for quilting and yarn for knitting and crocheting.


Entering into the next area under the arch (oh, and my husband built the cornices over the window and the wide arch) is where I have my cutting table and beloved sewing machine.  Along with more books, fat quarter storage, and sewing essentials.
 
I love my cutting table.  I know it is a bit messy, but I love it anyway!  The fabrics on the end are the fabrics I make the KnitClutches with and the batting peeking through at the bottom is what I use for them also.  It is definitely a great working space and so functional for me!
I


I am also a fan of modern quilting and quilter, Elizabeth Hartman.  You can find her at OhFransson.com.  One of the classes that I take on Craftsy.com she demonstrated how to make a great ironing surface.  This surface is so much better than a standing ironing board as it is a sturdy board (I used MDF) covered with batting, Thinsulate, and canvas.  I love it and rarely ever use my old ironing board.
 
I have another small window in this area which is to the left of my sink (where I love to dye fabrics, fibers, etc.) which use to be a beautiful white.  And beside the sink is another set of shelves for storing my fabric scraps and a bookcase to house some of my books.


I thought I would use the old cutting table for holding some of my WIPs.  At the moment, there is a wall hanging, table runner, small quilt and some of KnitClutches® waiting for me to get busy and finish.


Here’s one of my KnitClutches up close . . .


And this is how it works . . .
It is wonderful to use to take your
Knitting and Crochet projects with
you!


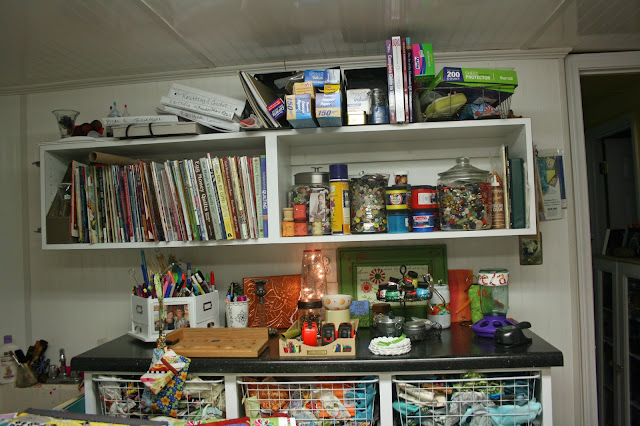
Now going into the Paper/Painting/Card Making/Mixed Media area you will see the desk and shelves that I use for storing some of supplies for crafting.


I have a free standing shelf, bookcase, and built-in to house some of my rubber stamps, shape punches, glues, paints, etc.
 

I have a tall cabinet that I store other supplies and frequently used items.

 
And finally, I needed a design wall and after this little tour you can see that I did not have a wall space big enough so I borrowed a wall in our guest bedroom.  More walking, but problem solved.


All of my cabinets were built by a local cabinet maker, Johnny Baker of Baker Cabinets in Bogart, Georgia. 

I hope you have enjoyed visiting my space.  Please come back and visit my blog to see what I am creating in my Studio.  Have a great day!

“You know you are a Quilter if your ironing

board is always set up, but you never

iron clothes.”