Wednesday, March 30, 2016

Dyeing Seam Binding


I just love making books. . .mini-albums for photos, journals, books from old books, you name it, I love it!  Even though I do love making books (did I already say that?), I think the embellishing is my favorite part.  Ribbon is my go to embellishment every time and even though I have way too much ribbon, I never seem to have the right color.


Solution:  Just pull out the Rit ® Dye, plastic bowls, scissors, and LOTS of white seam binding.  I use Hug Snug Seam Binding by Lawrence Schiff Silk Mills, Inc.  I order mine from Amazon.  It grabs the dye and I can custom dye my seam binding to match my projects.


Let’s dye some seam binding! 


What you need: 


1.     Cut off several yards of seam binding for each color of dye that you want to use.

2.   Fill each of the plastic bowls (not too full) with hot water, add dye color (I eyeball it and test the color on a paper towel).


Stirring to mix the dye and add your seam binding.


4.   Microwave on high for about 25 seconds.  Don’t heat too much as you might set your seam binding on fire!


5.   Remove from microwave being careful not to burn your fingers and rinse with cold water until water is clear.


6.   Pat dry with paper towel.  Do not worry if some color bleeds onto the paper towel as when the seam binding is dry the color is permanent!


7.   Dry.  I like to pin mine to clothes hangers and air dry on my porch.


Now this is what you have!  Isn’t it beautiful?  Looks just like little desserts.


Roll onto “spools”.  I made mine from cardstock cut t 4-1/4” by 3 ½”, cut small slits at top and bottom and fold back the middle section, punch a hole in the top and hang onto a ring.


Or you can just put your seam binding in storage bags, glassine bags, plastic containers, etc.  I just love looking at mine hanging in my studio.


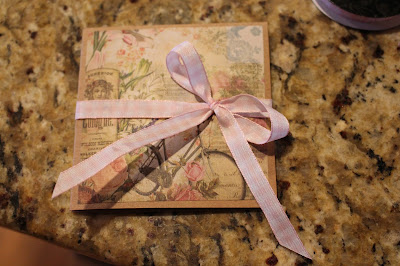
Okay, here are some small books I made and then embellished with my dyed seam binding.


And more books that I have made.  I will do a tutorial on how I made these later.


While I had my dye out I thought I would try 2-color dyeing.  This is what I got.  Not what I had in mind, but still cute, nonetheless.


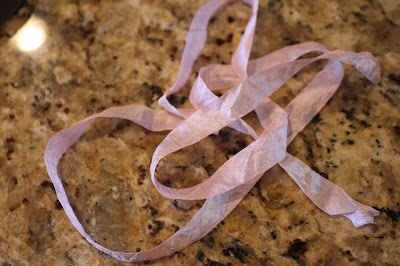
And I had some leftover beet juice (we like the beet pickles) so I threw a scrap into it.  The result was a light pink.


Have a wonderful day!


“Breathe in inspiration and trust yourself!”

Tuesday, March 15, 2016

Oh my gosh

I got so excited that I forgot to tell you how to put these jars together.  These are pint jars and I cut my scrapbook paper to 2 1/4" by 11".  Cut out your desired object in the center.  Roll the paper up and drop into the jar . . . it will unwind a bit . . . fill with candies of your choice.  Add tulle bow and tag to jar around the lid. 

So sorry!

Enjoy!

EASTER


Jelly Bean Jar for your children or grandchildren and who doesn't love jelly beans???


Easter is just around the corner so I thought I should make a little something for some of the younger grandchildren.  I am sure that this has been done hundreds of times, but this is how I put mine together.


I used the following:


Ø  An older tag punch from Marvy

Ø  Plain White Cardstock from Hobby Lobby – Pre-cut for card making

Ø  Stamp from May May Made It . . . I love her stamps!  Great quality and selection is awesome.  I am a member of her stamp of the month club which is really economical.  Go check it out at

Maymaymadeit.com.

Ø  Stampin Up Ink pad, Pear Pizzazz

Ø  Plain canning jars from Wal-mart

Ø  Tulle from Hobby Lobby

Ø  Twine from Michael’s Dollar Section

Ø  Brother Scan N Cut to cut out the bunnies

Ø  Scrapbook paper from Michaels

Ø  Jelly Beans from the $5 and Under Store


Now, of course, you can use whatever you have and cut out the section with scissors and you can use thread or yarn to tie on tag and you can use plain ribbon.  The possibilities are limitless and as economical as you can make it.  You can also upcycle old pickle jars.


Here they are . . .  What do you think?


They make up quickly and I think they are so stinking cute.  See what you can create for your children and grandchildren.  Just have fun!

            "Life is the art of drawing without an eraser."
                          -- Anonymous

Saturday, March 12, 2016

Birthdays, Birthdays, Birthdays!


Spring is almost upon us!  I cannot believe it!  We have had such a warm winter that my friends and I are very upset as we couldn’t wear our knitted shawls.  Well, maybe next winter.

I have been very busy making birthday cards, mini-scrapbooks, and card folios.  We have 2 grandsons, a daughter-in-law, a very good friend that have birthdays just in April.  I just love birthdays!  It is a celebration of another year and anticipating the year to come.

Here are some pictures of the cards I have been making:


And the inside of the cards . . .


These are the card folios that I will give along with their birthday present:


 And the inside of these folios for your note cards . . . 


And this is just one of the little mini-scrapbooks made from one 12 x 12” piece of cardstock.  I did add tags inside for journaling and/or pictures which took another 8 x 10" piece of cardstock.  All-in-all this book is very quick and economical as well as stinking cute.


I hope you get inspired from these and go make some pretty cards, mini-scrapbook, or card folios for someone special. 
Thanks for stopping by!  Hope you have a wonderful week!


               “Creativity is allowing yourself to make mistakes.  Art is knowing which ones to keep!”

                                           --Anonymous

Friday, February 12, 2016

Happy Valentine's Day


Hi, everybody!  Hope all of you have a very sweet and Happy Valentine’s Day!  Valentine’s Day can get so commercial but you can make something for your sweetie such as a cake, give flowers, make a card, etc.  But the main thing is to just give something of yourself!  And handmade items by you always have part of you with it!


I promised on my Facebook post that I would show you how to make a “Squash Card”.  So here goes . . .


The supplies you will need:


Scissors, bone folder (optional), trimmer (can be substituted using scissors), scoring board with diagonal plate (optional as you can use a ruler), scoring tool, ribbon, scor tape, and tape runner (you can substitute any adhesive of your choice making sure that it is super strong), 8 ½” decorative paper,

scraps of paper for the inside of your book/card.


Step one: Cut a square 8” x 8”.


Step two:  Score at 4”, rotate and score at 4”, and then score from corner to corner.


Step three:  Fold on score lines and burnish well!  Inside and Out.


This will fold into a 4 x 4” square.


Step four:  Attach ribbon to back of square.  Run a piece of scor tape across the back of the square and attach ribbon before putting on the back cover.  This is for the closure.  This step is also optional.  I just love the look of the ribbon tie so I use it all the time.  You can use pony tail bands, paper clips, etc. or nothing at all.


Insert: 


Now tie your ribbon. . .


Decorate your card/book for whatever occasion you are making it for.  I call mine a book as pictures can be adhered onto the inside if the recipient chooses to do so.


To decorate cut 2 - 3¾” squares for front cover and back cover.


Cut 2 – 3-5/8” squares and then cut again from point to point for the inside.


Adhere these pieces with adhesive of your choice.


The Trimmer and Score Board are both Stampin Up products.  If interested, you can go online at stampinup.com and search demonstrators.  You will find me in Bishop/Athens area.  Place your order and have fun! 


Now, for Valentine’s (or next holiday or occasion), using Shrinky Dinks made for Ink Jet printers, make a brooch.  Mine was made from a page from my sketch book that I copied in my Ink Jet printer, cut it out into a heart shape, and attached a pin on the back.  Remember, if you want a hole to use as a necklace or to make earrings, punch before you shrink.  Also, follow the directions on the Shrinky Dink package and cut your piece about 2/3 to more larger as it will definitely shrink during the heating process.


This is my valentine brooch:


Also, for part of my Valentine decorating, I made a fabric vase.  If interested, I will give information and a written tutorial on this.


These are silk flowers; however, you can place a small container inside the vase from the bottom (bottom is open), add water, place vase over container, and add fresh flowers.


Finally, before the year gets away from me, I made this calendar using an inexpensive acrylic frame and scraps of paper. 


These are some fun projects that I enjoy doing and I know that you will too.  Get creative and embellish, change up, or use my ideas, JUST HAVE FUN!


“Creativity is allowing yourself to make mistakes,

Art is knowing which ones to keep.”

--Anonymous

Thursday, January 28, 2016

Blogging Again

Good morning!  I am so glad you dropped by for a visit!

It is hard to believe that I haven't blogged in so long, but life has a way of shaking things up.  Hopefully, everything around these parts will settle down and I can get back to blogging.

If you go back and read some of the older posts, you will see that I have a, what shall I call it, well, I have a need to doodle.  I've been doodling for years and I must say that nothing is safe around me when I have a Sharpie in my hand. 

Below are just some samples of my doodling as of late.  I suggest that you pick up a pen, pencil, or whatever, and start doodling.  It's a great stress reliever!

First one is doodling on an empty tin of chocolates that my husband got for Christmas.  Oh my, they were delicious, and sugar-free.


This next picture is an example of what I do to empty cereal boxes . . .


Then I turn them into this . . .


And I love to doodle on canvas bags and aprons . . .


And fabric to use to use on a variety of projects . . .


And it all starts here . . .

My sketchbook!


Doodling is one of the things I do everyday.  I find it a most relaxing activity, but I have to have my husband remind me of the time as I lose all track of it.

In my studio

"THERE ARE NO RULES
THERE ARE NO MISTAKES
AND EVEN IF I MAKE A 'MISTAKE',
I CAN ALWAYS FIX IT.
BUT THEN AGAIN,
TEHRE ARE NO MISTAKES!

Have a great day!  And be sure to visit again!